Chlebek bananowy. || The banana bread.

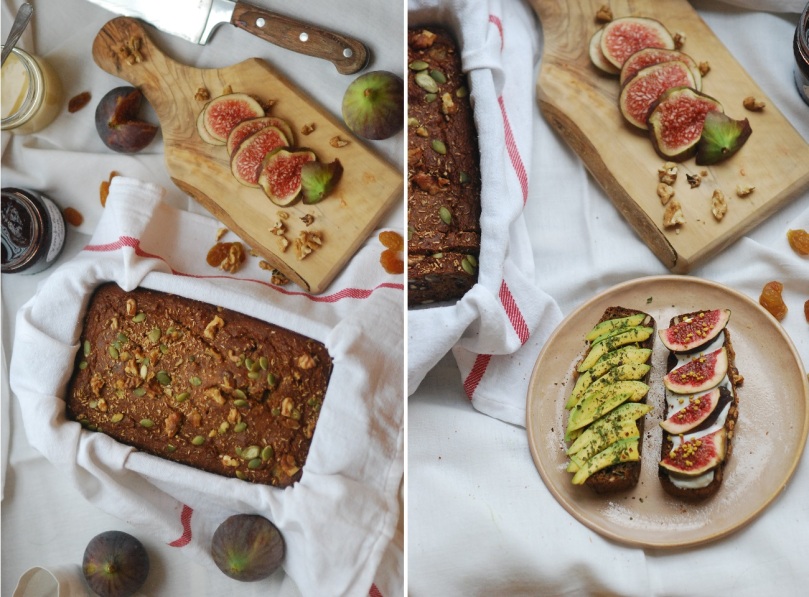
Spędzając weekend u Rodziców rozpoczęłam zwiad kuchenny. Wkroczyłam pomiędzy szafki, mając się na baczności. Oho! Trzy dojrzałe banany smętnie czerniały w koszu na owoce. Resztki orzechów czekały na lepsze czasy (albo kogoś głodnego i z niedoborem nienasyconych kwasów tłuszczowych) w ikeowskiej puszce. Mąka orkiszowa, cenny łup dla rozkruszków, kryła się pomiędzy innymi mąkami w najniższej szufladzie.

Coś z tym trzeba zrobić, zdecydowałam, przypominając sobie natychmiast przepis, który wpadł mi w oko kilka dni wcześniej. Postanowiłam go odrobinę zmodyfikować i stworzyć idealny, prosty, szybki bananowy chlebek.

Ale, ale… Z duszą na ramieniu. Bo z tymi bananowymi chlebkami nigdy nie wiadomo. Czasem wychodzą za miękkie. Czasem za niskie. Innym razem w ogóle nie są słodkie, a przy odmiennej okazji nie da się ich w ogóle nazywać “chlebkami”, gdyż przy nadmiernej słodyczy dojrzałych bananów od razu zmieniają się w ciasto…

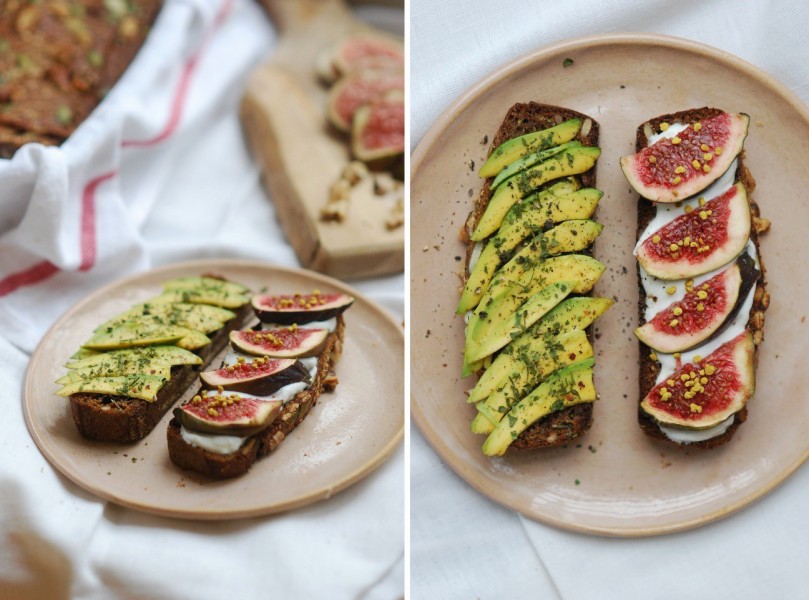
Jak się jednak okazało, najwyraźniej odkryłam klucz do sukcesu (zaraz się podzielę). Udało się. Chleb piekł się krótko, zdążając jednak wypełnić salon cudowną, już prawie-świąteczną wonią. Wyszedł odpowiednio wilgotny, jednak nie gliniasty, lub – co gorsza – gumiasty. Sprawdził się na podwieczorek, a jeszcze lepiej – podgrzany w tosterze – pasował zarówno do słodkich (greckiego jogurtu, domowej konfitury, miodu, fig i pyłku pszczelego), jak i słonych (awokado, wędzony twaróg, solone masło) dodatków.

Kluczowym elementem okazało się być użycie blendera. Nie słuchajcie tych, którzy mówią, że wystarczy banana rozgnieść widelcem. Dopiero dokładnie rozdrobniony w robocie kuchennym sprawi, że struktura ciasta będzie idealna – bez żadnych grudek, glutów, albo innych żałosnych śladów zakalca.

Po drugie – odpowiednie proporcje soli, przypraw i miodu sprawiły, że chleb perfekcyjnie balansował smakiem na granicy z ciastem. Okazał się być wypiekiem uniwersalnym i naprawdę pasował zarówno do słodkości konfitury, jak i słoności duńskiego masła.

I w końcu właściwa temperatura pieczenia pozwoliła wypiekowi spokojnie dojrzeć w piekarniku, nie zmieniając go przy tym w spalony wiór.

PS. Zwróćcie uwagę, że oprócz oczywistych zalet smakowych, chlebek (z którego, jak widać, jestem zajebiście dumna), ma niesamowite walory zdrowotne. Jest tak naprawdę bombą potasowo-fosforową z dodatkiem kwasu alfa-linolowego. A dla cierpiącego na niedobory magnezu Taty chlebek stanowi nie tylko przekąskę, ale i prawie-lekarstwo!

odrobina oleju kokosowego
170 g mąki orkiszowej
2,5 dojrzałych bananów
2 łyżki miodu
3 jajka
1,5 łyżeczki proszku do pieczenia
pół łyżeczki sody oczyszczonej
1/3 szklanki pokruszonych orzechów włoskich
1/3 szklanki nasion słonecznika
1/3 szklanki pestek dyni
2 – 3 łyżki wiórków kokosowych
garść suszonej żurawiny/rodzynek, lub i tego i tego
1,5 łyżeczki cynamonu
1/2 łyżeczki kardamonu
1/2 łyżeczki gałki muszkatołowej
1/2 łyżeczki suszonego imbiru
łyżeczka-dwie soli

Rozgrzej piekarnik do 180 stopni.

Połamane banany umieść wraz z przyprawami (w tym solą), miodem i jajkami w kielichu blendera. Możesz użyć także miksera ręcznego. Blenduj ok. 2 minuty, do powstania gładkiej masy.

Przelej mieszaninę do miski. Dodaj mąkę przesianą z proszkiem do pieczenia i sodą oczyszczoną. Wymieszaj dokładnie, aż w ciście nie będzie grudek. Dodaj orzechy, wiórki, pestki i nasiona, oraz suszone owoce. Ponownie wymieszaj. Przelej do posmarowanej olejem kokosowym i wysypanej mąką formy. Piecz przez około 40 minut (w skrajnych sytuacjach – do godziny!), w razie potrzeby pod koniec pieczenia przykrywając wierzch folią aluminiową.

Smacznego!

Córka.

bananiwo

While spending the weekend with Parents I began spying in the kitchen.  Getting in between the kitchen cabinets I knew I had to be alert. Oho! There! Three ripe bananas sadly blackened in fruit basket. The remnants of nuts waited for better times (or someone hungry and with a unsaturated fatty acids deficit) in white Ikea can. Spet flour, a valuable prey for the pantry moths, was hidden between other flours in the lowest drawer.

Something has to be done, I decided, remembering the recipe that caught my eye a few days earlier. I decided to modify it a little bit and create the perfect, simple, quick banana bread.

But, but … with my heart in my mouth. Because you just never know wit these banana breads… Sometimes they go too soft. Sometimes too low. Another time, they are not sweet at all, and with a different occasion they can not be even called “breads,” because of the excessive sweetness of ripe bananas that immediately turn them into a cake…

But as it turned out, I apparently discovered the key to success. Bread was ready really quickly, in the meantime filling the room with a wonderful, almost-Christmassy scent. It was moist, but not clayey. It turned out to be a great afternoon snack, or even better – heated in the toaster – fit both sweet (greek yogurt, homemade jams, honey, figs and be pollen) and savory (avocado, smoked cottage cheese, salted butter) breakfast add-ons.

A key element turned out to be the use of a blender. Do not listen to those who say that it is sufficient to mash the bananas  with a fork. Only thoroughly shredded in a food processor, it will make the structure of the dough perfect – no lumps, no clods, or other pitiful traces of slack-baked cake.

Second – the right proportions of salt, spices and honey made the bread taste perfectly – on the border with cake. It turned out to be versatile and really fit both: the sweetness of jam and the saltiness of Danish butter.

And, in the end , it was the correct baking temperaturę that allowed the bread to grow in the oven without changing it at the same time in a burned chip.

PS. Note that in addition to the obvious advantages of flavor, the bread (which, as you can see, I’m fucking proud of), has amazing health benefits. This is really a  potassium and phosphorus bomb, also containing some alpha-linolenic acid. And for  Dad,suffering from a magnesium deficiency, this bread it is not only a snack, but almost-a- medicine!

a little bit of coconut oil
170 g spelt flour
2,5 ripe bananas
2 tablespoons of honey
3 eggs
1.5 teaspoons of baking powder
half a teaspoon of baking soda
1/3 cup of crushed walnuts
1/3 cup of sunflower seeds
1/3 cup pumpkin seeds
2 – 3 tablespoons of grated coconut
a handful of dried cranberries / raisins, or both
1.5 teaspoon of cinnamon
1/2 teaspoon of cardamom
1/2 teaspoon of nutmeg
1/2 teaspoon of dried ginger
a teaspoon or two of salt

Preheat the oven to 180 degrees.

Broke the bananas into pieces and place with spices (including salt), honey and eggs in a blender cup. You can also use a hand mixer. Blend for approx. 2 minutes, until it will form a smooth mix.

Pour the mixture into a bowl. Add the sieved flour with baking powder and baking soda. Mix thoroughly until smooth. Add nuts, coconut, seeds, and dried fruit. Stir again. Pour into an oiled and floured baking tray. Bake for about 40 minutes (in extreme cases – for an hour!) If necessary, at the end of the cooking time, cover the surface with aluminum foil.

Bon Appetit!
Daughter.

chlebbb

Aksamitna kalafiorowa z czarnuszką. || Silky cauliflower soup with black onion seeds.

kalaf3

Kilka dni temu J., moja miła współlokatorka, wspomniała, że nie cierpi, gdy prowadzący programy kulinarne określają przygotowane przez siebie potrawy przymiotnikiem sexy.

Zgodziłam się.

Generalnie (i wulgarnie), jeśli coś mi smakuje, zazwyczaj określam to (niestety) mianem zajebistego. I wystarczy. Irytuje mnie to ciągłe okraszanie nazw potraw nabzdyczonymi, przekombinowanymi epitetami. Czy teraz jedzenie już naprawdę zawsze musi być organiczne, superfantastyczne, idealne, perfekcyjne, a do tego seksowne?

Czy bez dziesięciu różnych określeń poprzedzających jego właściwą nazwę, danie smakuje gorzej?

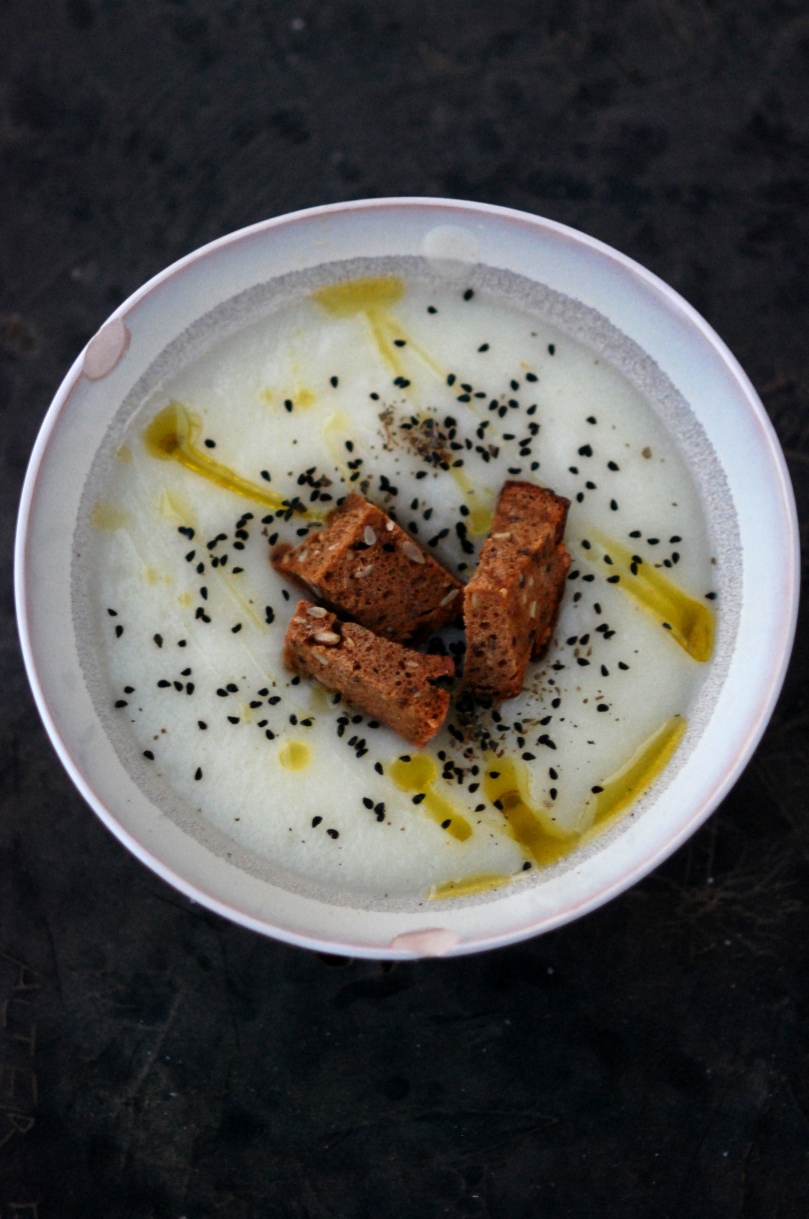
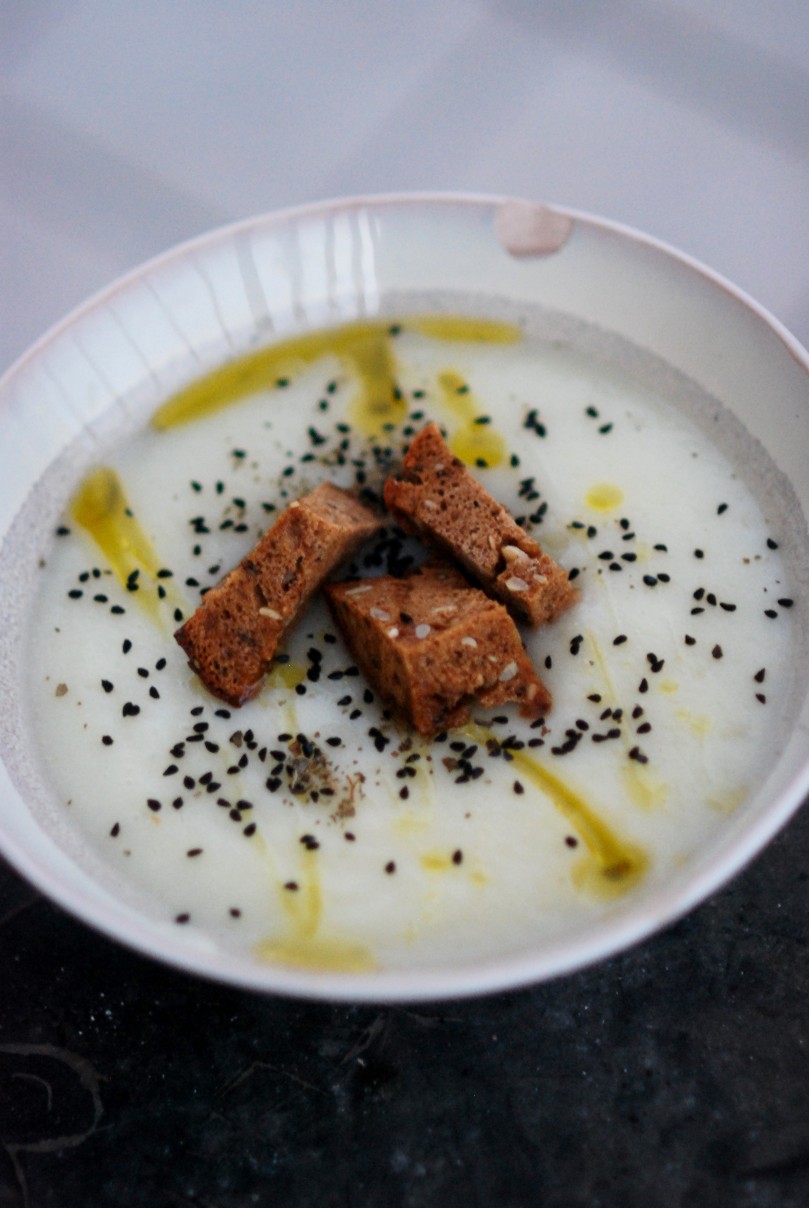
Nie sądzę. A jednak w kontekście kremu, na który przepisem chcę Was dziś poczęstować, po prostu nie mogę się oprzeć. Muszę je skrzywdzić prawie-literackim przymiotnikiem. Bo – na litość boską – ta zupa naprawdę jest aksamitna. Absolutnie, diabelnie, niewyobrażalnie gładka.

1 spory ziemniak
1 cebula
1 główka kalafiora
1 łyżka oliwy z oliwek
trochę gorącej wody
sól i pieprz do smaku
ziarna czarnuszki do posypania
opcjonalnie: parmezan, grzanki, oliwa do polania

Jest to przepis banalny. Przygotuj dwa garnki – jeden duży, na właściwą zupę i drugi, mniejszy. Może być rondelek. W większym garnku zagotuj osoloną wodę i gotuj w niej skrojonego w ćwiartki obranego ze skóry ziemniaka aż będzie względnie miękki. Następnie dodaj kalafiora. Gotuj do miękkości.

W rondelku rozgrzej łyżkę oliwy. Wrzuć cebulę i podsmażaj, aż leciutki się zarumieni i zmięknie. Możesz dodać trochę wody.

Odcedź warzywa, ale nie odlewaj całej wody. Dodaj cebulę, pieprz i imbir. Zblenduj na gładki krem. Podawaj z grzankami, oliwą i ziarnami czarnuszki. I uważaj, żeby się nie oparzyć – ta zupa “trzyma ciepło” jak jasna cholera!

kalaf

A few days ago, J., my dear flatmate, mentioned that she suffers when the cooks from the culinary programs define their meals using the adjective: sexy.

‘It’s horrible’, she said and I agreed.

In general (and being vulgar here), if something tastes good to me, I usually define it (unfortunately) as fucking good. And it’s enough. Ah, this whole manner of using all of the fancy, snobby names of dishes full of  unncessary, complicated epithets just irritats me. Does the food really need to always be organic, ideal, superfantastic, perfect, and, of course, sexy?

Will the dish taste worse without them?

I do not think so. But in the context of this cream soup… I just can not resist. I have to hurt the name with an almostliterary adjective. Because for God’s sake this soup really is silky (or velvety even, if you prefer). Absolutely, devilishly, incredibly smooth.

1 quite large potato
1 onion
1 head of cauliflower
1 tablespoon of olive oil
some boiling water
salt and pepper to taste
black onion seeds to sprinkle on top
optional: some parmesan cheese, croutons, olive oil

This recipe definitely is one of these easy-as-pie recipes you can use on a lazy day.

Prepare two pots one largefor the soup and a second one, smaller. It can also be a saucepan. Pour some water into the bigger pot. Add salt. When the water is boiling,throw in the peeled potato cut into quarters. Cook until it is relatively soft. Now it is the moment when you add the cauliflower. Stir well. Cook the veggies until tender.

In a saucepan, heat the tablespoon of olive oil. Put the onion in and fry until it is lightly golden brown and tender. You can add a little water, too.

Drain the vegetables, but safe some water. Add the onion, pepper and ginger into the big pot. Blend, until you’ll end up with a smooth cream. Serve with croutons, olive oil and black onion seeds. And be careful not to burn yourself this soup really “keeps the warmth” like hell! 

Galette pieczona partiami. || Galette baked in parts

galet

[English version below]

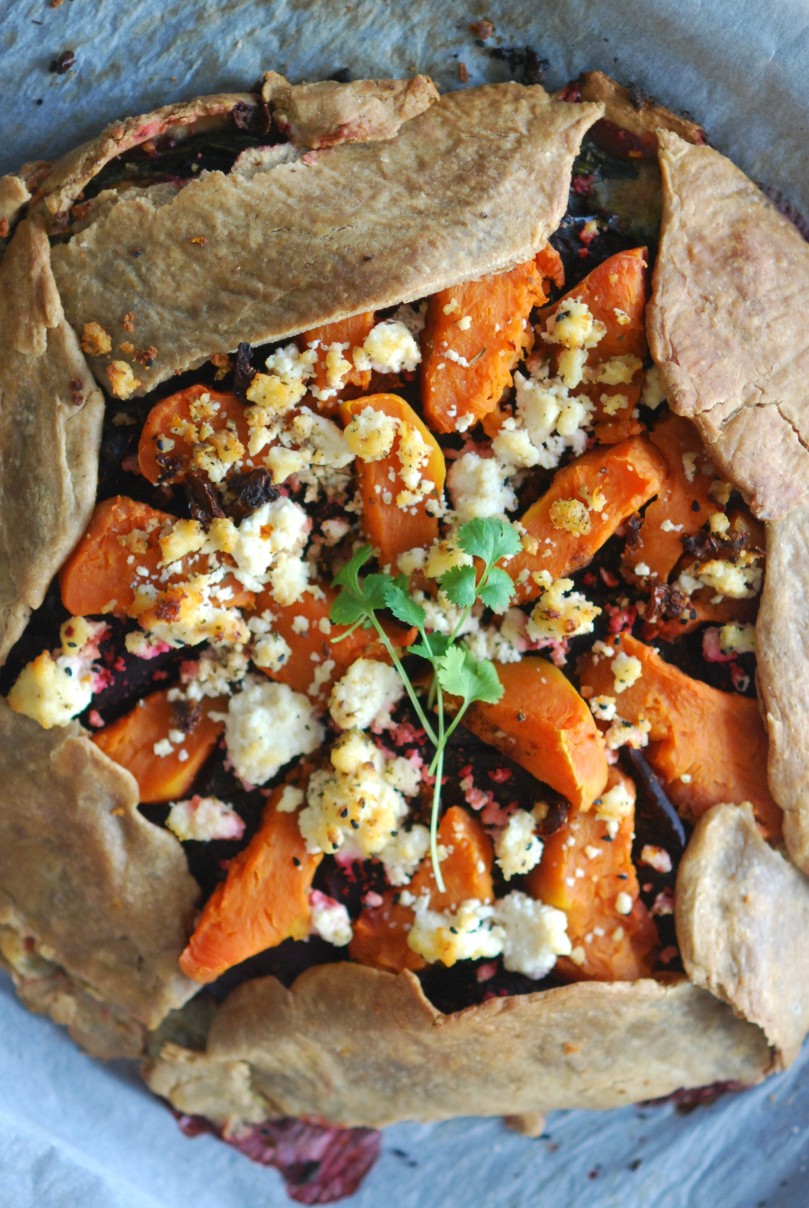
Jesień. Uliczne stragany uginają się pod ciężarem dyń, studenci opuszczają rodzinne domy, by znów rzucić się w wir akademickiego życia, a skracający się dzień sprawia, że jakoś tak nie chce się gotować potraw skomplikowanych… Zaskakujące, ale te trzy elementy można złączyć w kombinacji, z której powstanie nic innego, jak bardzo prosta w przygotowaniu, całkiem zdrowa i bardzo (nieskromne słowo honoru) pełnoziarnista galette.

Ciasto:
2 szklanki mąki pełnoziarnistej
70 g zimnego masła
1 jajko
2/3 szklanki zimnej wody
szczypta soli

Nadzienie:
ok. 300 g świeżego szpinaku
2 średnie buraki
ok. 300 g dyni – u nas dynia Muscat
2/3 szklanki ulubionego sera – sprawdzi się pokruszony ser kozi albo pieczony twaróg, ale i porwana mozzarella
łyżka suszonego tymianku
łyżka czarnuszki
sól, pieprz – do smaku

Przygotowanie galette najlepiej jest rozpocząć wieczora poprzedzającego dzień, w który chcemy jej skosztować. Dzięki temu unikniemy pośpiechu i przykrego dreszczu zniecierpliwienia – spokojnie upieczemy dynię i buraki, a także zagnieciemy ciasto, które przez noc dojrzeje sobie w lodówce.

Najpierw zagnieć ciasto: mąkę przesiej z solą na stolnicę, dodaj pokrojone w kostkę zimne masło i siekaj lub mieszaj, aż składniki się połączą. W połowie procesu dodaj jajko i „podlej” mieszaninę zimną wodą. Zagniataj energicznie, aż otrzymasz elastyczną, choć dość zbitą kulę. W razie potrzeby podsyp mieszankę mąką, lub dodaj do niej więcej wody. Zawiń kulę ciasta w folię aluminiową i odłóż do lodówki na minimum jedną godzinę, a najlepiej całą noc.

Buraki umyj i osusz. Ponakłuwaj wykałaczką lub „podźgaj” głęboko cienkim nożem. Owiń folią aluminiową i piecz w 200-220 stopniach do miękkości, czyli około 1,5 godziny.

Kiedy buraki będą „dochodzić”, zajmij się przygotowaniem dyni. Obierz ją ze skóry i pokrój w kostkę. Natrzyj lekko oliwą, posyp solą i pieprzem (opcjonalnie także słodką lub ostrą papryką, albo nawet cynamonem, jeśli masz ochotę na oryginalny i bardzo jesienny smak). Wyłóż na blachę obok buraków i piecz, aż dynia nieco zmięknie i zarumieni się – ok. 20 minut.

Ostudź warzywa, w razie potrzeby przechowaj przez noc w lodówce.

Następnego dnia zajmij się przygotowaniem galette. Rozgrzej piekarnik do 200 stopni.

Wyjmij ciasto z lodówki, pozwól mu się chwilę ocieplić i rozwałkuj na placek grubości ok. 0,7 cm. Jeśli nie zależy Ci na idealnie ślicznym placku, nie przejmuj się nierównością brzegów – ta tylko dodaje galette rustykalnego uroku. Następnie wstaw placek do piekarnika na parę minut. Pamiętaj, by wyciągnąć ciasto gdy będzie jeszcze elastyczne – tylko wtedy będziesz mógł bez problemu zagiąć jego rogi.

Szpinak sparz wodą i dokładnie odcedź; posól i przemieszaj. Buraki obierz ze skórki, pokrój na cienkie plasterki. Porwany lub pokruszony ser przemieszaj z czarnuszką.

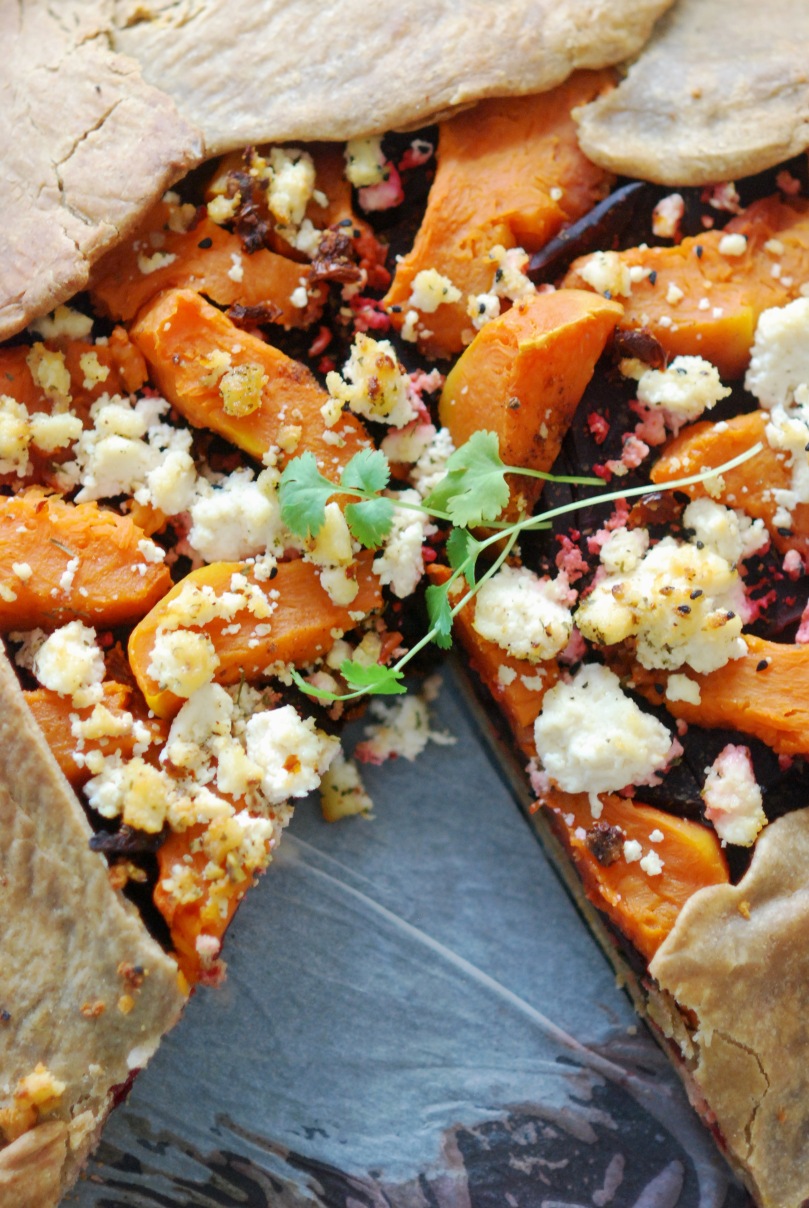
Sparzony szpinak wyłóż na ciasto i rozprowadź równomiernie. Na nim układaj plasterki buraka tak, by lekko na siebie zachodziły – jak w klasycznej tarcie. Posyp buraki solą, pieprzem i tymiankiem. Na ich wierzchu rozłóż kawałki pieczonej dyni. W końcu posyp całość serem i zawiń ciasto, by „objęło” wszystkie składniki.

Wstaw galette do piekarnika i piecz około 35-40 minut. W połowie czasu pieczenia sprawdź, czy góra się nie przypala. Jeśli tak będzie, okryj ciasto folią aluminiową.

Córka

gal1

Autumn. Street stalls weigh down under the weight of pumpkins, students leave family homes, to once again throw themselves into the frenzy of academic life and shortening of the days makes you, somehow, too lazy to prepare complicated meals… Surprisingly, these three elements can be mixed into the combination that allows you to prepare very easy, very healthy and very (I give you my immodest word of honor) whole wheat galette.

The dough:
2 cups of whole-wheat flour
70 g of cold butter
1 egg
2/3 cup of cold water
a pinch of salt

Filling:
approx. 300 g of fresh spinach
2 medium beets
approx. 300 g of pumpkin Muscat pumpkin in our case
2/3 cup of your favorite cheese check out the crushed goat cheese or baked cottage cheese, or mozzarella cheese
a tablespoon of dried thyme
a tablespoon of cumin
salt and pepper – to taste

It’s best to start preparing the galette the evening preceding the day on which we want to eat it (complicated, I know). It will allow us to avoid the rush and unpleasant thrill of impatience  – we’ll have the time to calmly roast the pumpkin and beetroots, as well as to prepare the dough that  will matures itself overnight in the refrigerator.

So first, knead the dough: Sift flour with salt on a pastry board, add the diced cold butter and chop or stir until the ingredients have combined. In the middle of the process, add the egg and water” your mixture with cold water. Knead vigorously until you get a flexible, although quite hard ball of dough. If necessary, add some more flour or more water.  Wrap the ball of dough in aluminum foil and put in the fridge for at least one hour, or, preferably, overnight.

Wash and dry the beets. Prick them deeply with a toothpick or a thin knife. Wrap in aluminum foil and bake in 200-220 degrees until tender – for approximately 1.5 hours.

When the beets will be almost soft, take care of the preparation of the pumpkin. Peel the skin off and cut the orange vegetable into cubes. Rub lightly with olive oil, sprinkle with salt and pepper (optionally add sweet or hot paprika or even cinnamon if you fancy an original and very autumnal flavor). Throw the pumpkin onto a baking tray next to the beets and bake until tender and slightly browned – approx. 20 minutes.

Quench vegetables, if necessary store it in a refrigerator overnight.

The next day, take care of the preparation of the galette. Preheat oven to 200 degrees.
Remove the dough from the refrigerator, let it warm up and roll until you’ll get the thickness of approx. 0.7 cm. If you do not care about perfectly lovely cake, do not worry about inequality of the edges – it only adds this rustic charm to the galette.  Then put the cake in the oven for a few minutes. Remember to remove the cake when it is still flexible – only then will you be able to easily bend the edges.
Blanch the spinach with hot water and drain thoroughly; sprinkle with salt and shuffle. Peel beets and cut them into thin slices. Mix your cheese of choice with black onion seeds.
Spread the blanched spinach evenly on the cake. Lay the sliced beets on top of it so they slightly overlap – as in the classical tart. Sprinkle the beets with salt, pepper and thyme. Top with pieces of roasted pumpkin. Finally, sprinkle with cheese and fold the corners so the cake will cover the filling. Insert the galette to the oven and bake for about 35-40 minutes. In the middle of cooking time, make sure the top does not burn. If it does, cover the dough with aluminum foil.

Daughter

Pierwszy jesienny krem – z pieczonych warzyw. || First autumn-y cream soup – made with roasted veggies.

zupa3

Chyba każda matka wie, jak to jest, pierwszy raz po gorącym lecie poczuć zziębnięty nos własnego dziecka. Oznacza on, że sierpniowe upały minęły bezpowrotnie i czas pomyśleć o zmianie obiadowego menu. Zwiastuje przemianę chłodników i lekkich sałatek w zupy stojące „na ciepłym”, pożywne potrawki i zapiekanki prosto z piekarnika.

Kiedy wczorajszego popołudnia, wracając do domu, córka spytała mnie przez telefon: Mamo, co na obiad?, pierwszą myślą było: ZUPA.

Ale nie wodnista pomidorowa z ryżem, jaką pamiętam z mojego rodzinnego domu, ale barwny, pikantny krem z pieczonych warzyw.

1 kg dojrzałych pomidorów
3 duże czerwone papryki
1 duża cebula
2 marchewki
1 pietruszka
1 mały patat
oliwa z oliwek do pieczenia warzyw
duża szczypta suszonych ziół prowansalskich
1/3 łyżeczki pieprzu cayenne
½ łyżeczki słodkiej papryki
około ½ litra przegotowanej wody
sól i pieprz do smaku

Rozgrzej piekarnik do 200 stopni.

Pomidory i cebulę pokrój na połówki, usuń gniazda nasienne z papryki i pokrój ją na ćwiartki. Marchew i pietruszkę przekrój wzdłuż, a patata skrój w średnią kostkę. Posmaruj warzywa oliwą i posyp solą, a potem ułóż na blachach do pieczenia – osobno pomidory, które pieką się najkrócej, osobno marchew, pietruszkę i ziemniaki. Wstaw do piekarnika. Pomidory wyjmij po około 20 minutach. Paprykę piecz, aż jej skórka będzie czarna. Pozostałe warzywa piecz przez mniej więcej 40 minut, do miękkości.

Przestudź paprykę i pomidory i zdejmij z nich skórę. Wrzuć do blendera lub garnka z pozostałymi warzywami oraz przyprawami. Zblenduj w kielichu lub zmiksuj przy użyciu blendera ręcznego, dolewając gorącą wodę – jej ilość dostosuj do osobistych preferencji. Zagotuj zupę i podawaj gorąca, najlepiej z dodatkiem ziół i ulubionego sera – na przykład ricotty, lub koziego o wyrazistym smaku. Ja bardzo lubię ją także z solonym preclem piwnym moczonym w oliwie z oliwek.

Mama

zupa2

I think that every mother knows what it’s like to, for the first time after a hot summer, feel a cold nose of her own child. It means that the August heats are gone and it’s time to think about changing the dinner menu. It also means transforming chilled soup and light salads into warm vegetable cream soups waiting “on a stove”, nutritious stews and casseroles straight from the oven.

When my daughter, returning home yesterday afternoon, asked me over the phone: Mom, what’s for dinner ?, my first thought was: SOUP.

But not watery tomato soup with rice, which I remember from my parents’ home, but colorful, spicy cream soup made with roasted vegetables.

1 kg of ripe tomatoes
3 large red peppers
1 large onion
2 carrots
1 parsley
1 small sweet potato
olive oil for roasting vegetables
a large pinch of dried provencal herbs
1/3 teaspoon of cayenne pepper
½ tsp of sweet paprika
approximately ½ liter of hot water
salt and pepper to taste

Preheat the oven to 200 degrees.

Cut tomatoes and onions in half, remove the seeds from the peppers and cut them into quarters. Cut carrots and parsnips along, and cut the sweet potato into medium cubes. Brush the vegetables with olive oil and sprinkle with salt, then place them on a baking trays – separately tomatoes, which need only 20 minutes of roasting, separately carrots, parsnips and potatoes.

Put your veggies in the oven. Remove the tomatoes after about 20 minutes. Bake the peppers until their skin is black. Bake the rest of veggies for about 40 minutes – until tender.
When the peppers and tomatoes are cool, remove their skin. Throw them into a blender or a pot with the rest of your vegetables and spices. Blend in the blender, or with a hand blender adding hot water – adjust its quantity to your personal preferences. Boil the soup and serve hot, preferably with the addition of herbs and favorite cheese – such as ricotta or goats cheese. I also like to eat it with salted pretzel dipped in olive oil.

Mom